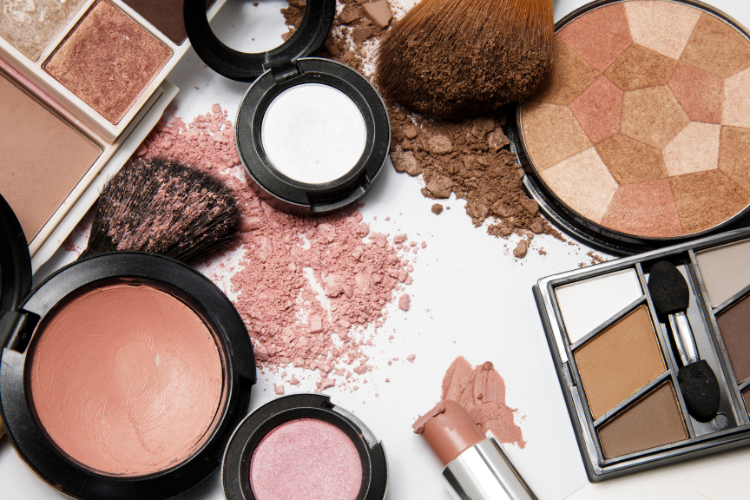
I can’t stress enough, especially at this time of year, how important it is to learn some new ways to make your eye makeup look totally GLAM! We all tend to fall into a rut, using the same products, and staying with the same familiar colors. This surely needs to change during the holiday season! So, let’s surprise our friends and family this season by switching up our beauty routine. Follow our holiday eye makeup tutorial, and you just might make this part of your everyday look when you see everyone’s response to how fab you are! (And, keep reading for a bonus make up tip at the end…)
Holiday Eye Makeup Tutorial – Let’s All Be GLAM!
I am BEYOND excited to introduce you all to Samantha Mair! She is a 22 year old mother of two who is a trained Elizabeth Arden Consultant and (what I like to say) a makeup master! Her passion lies in the cosmetics and skincare industry, but the most rewarding aspect for her is making women feel beautiful. She is sharing some of her favorite tips and a wonderful holiday eye makeup tutorial below, AND is available to help you with your makeup during the holidays and beyond. You can easily contact her through her Facebook Page HERE!
Smokey Eyes

Smoky Eyes are a look perfect for dinners, work parties, dates or any evening occasion. Samantha’s pallet of choice is the Revlon Custom Eyes Smoky Pallet along with Lancome Liquid Eyeliner . (As with all her looks you can add lashes or not, as per your preference, but Samantha feels that the lashes can sometimes draw away the intensity of the quintessential black smoky eye look.)
#GlamTip: Samantha’s favorite crayon eyeliners are by LA Girl, as they are very inexpensive and are made by the same company as a prestige brand, but retail for a third of the price! Added value: no smudge!
#GlamTip: Use numerous brushes for each color. They are an important factor in getting the blending correct. Here are the important ones to take note of:

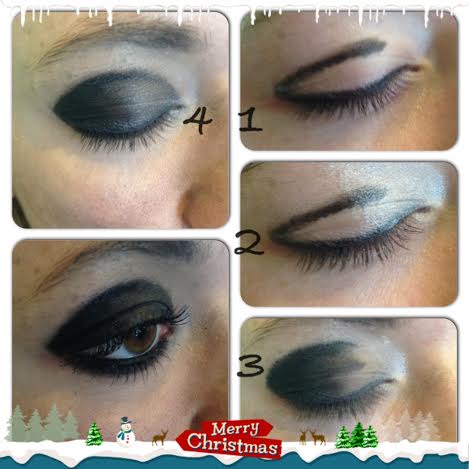
Step 1 – Start by taking your liquid eyeliner and drawing the outline of your eye with black (don’t worry if it’s not perfect – that’s where blending comes in at the end!) Samantha slightly pulls out her eye a little and follows along the natural lash line and up around the eyeball as shown in the pictures. (Tip- keep your eye closed while the liquid liner dries.)
Step 2 – Once both eyes are lined and you have let the liner dry, take your white (or lightest shade) and fill in the INNER corner of both eyes. Using a different brush, use a grey or navy hue and fill in the middle of your eyelid. And don’t worry about getting messy – it’s the best way to create amazing eyes!
Step 3 – Next, with an angled brush, take your black or the darkest shade you have, tap off all excess from brush, and fill in from the outer corner of the eye inwards, shading in the outline you made in the first step.
Step 4 – Take a big blending brush and blend in the three colors, then tidy the eye with a cotton bud. And now you can add a little more black shadow to the corners for emphasis.
Step 5 – Apply a dark crayon eyeliner to the bottom waterline and use a clean powder brush to clear away fall out before applying your foundation. Samantha suggests Elizabeth Arden Maximum Volume Mascara for this look and a natural lip shade so all attention is on your eyes!
Posh Purples

Using Elizabeth Arden’s Untold Color Collection you can transform the Smoky Eye look while following the same steps, just by changing your hue to yummy purple! And add even more glam to your Posh Purple with glitter shadow along the waterline and inner corner of the eyelid!
Bonus: Ombre Lips!

#GlamTip: You can create this effect with most lipstick shades – you just need a lip liner that is darker than your desired lipstick shade.
Samantha uses Elizabeth Arden lip liner in Fuchsia and lipstick shade is St.Germain by MAC (MAC lipsticks are her favorite because they are highly pigmented and long wearing.).
Step 1 – Apply your lip liner around the edge of your lip line then use a lip brush to apply your lipstick so it can blend nicely.
Step 2 – If you want a really definitive line around the lips, then go over your first line once you have applied the lipstick. Voila. You are good to go, Gorgeous!
Which idea will you be trying out first?
Fashionably Yours,
Allison
**Project Motherhood was compensated to write this post. As always, opinions are 100% our own.**
