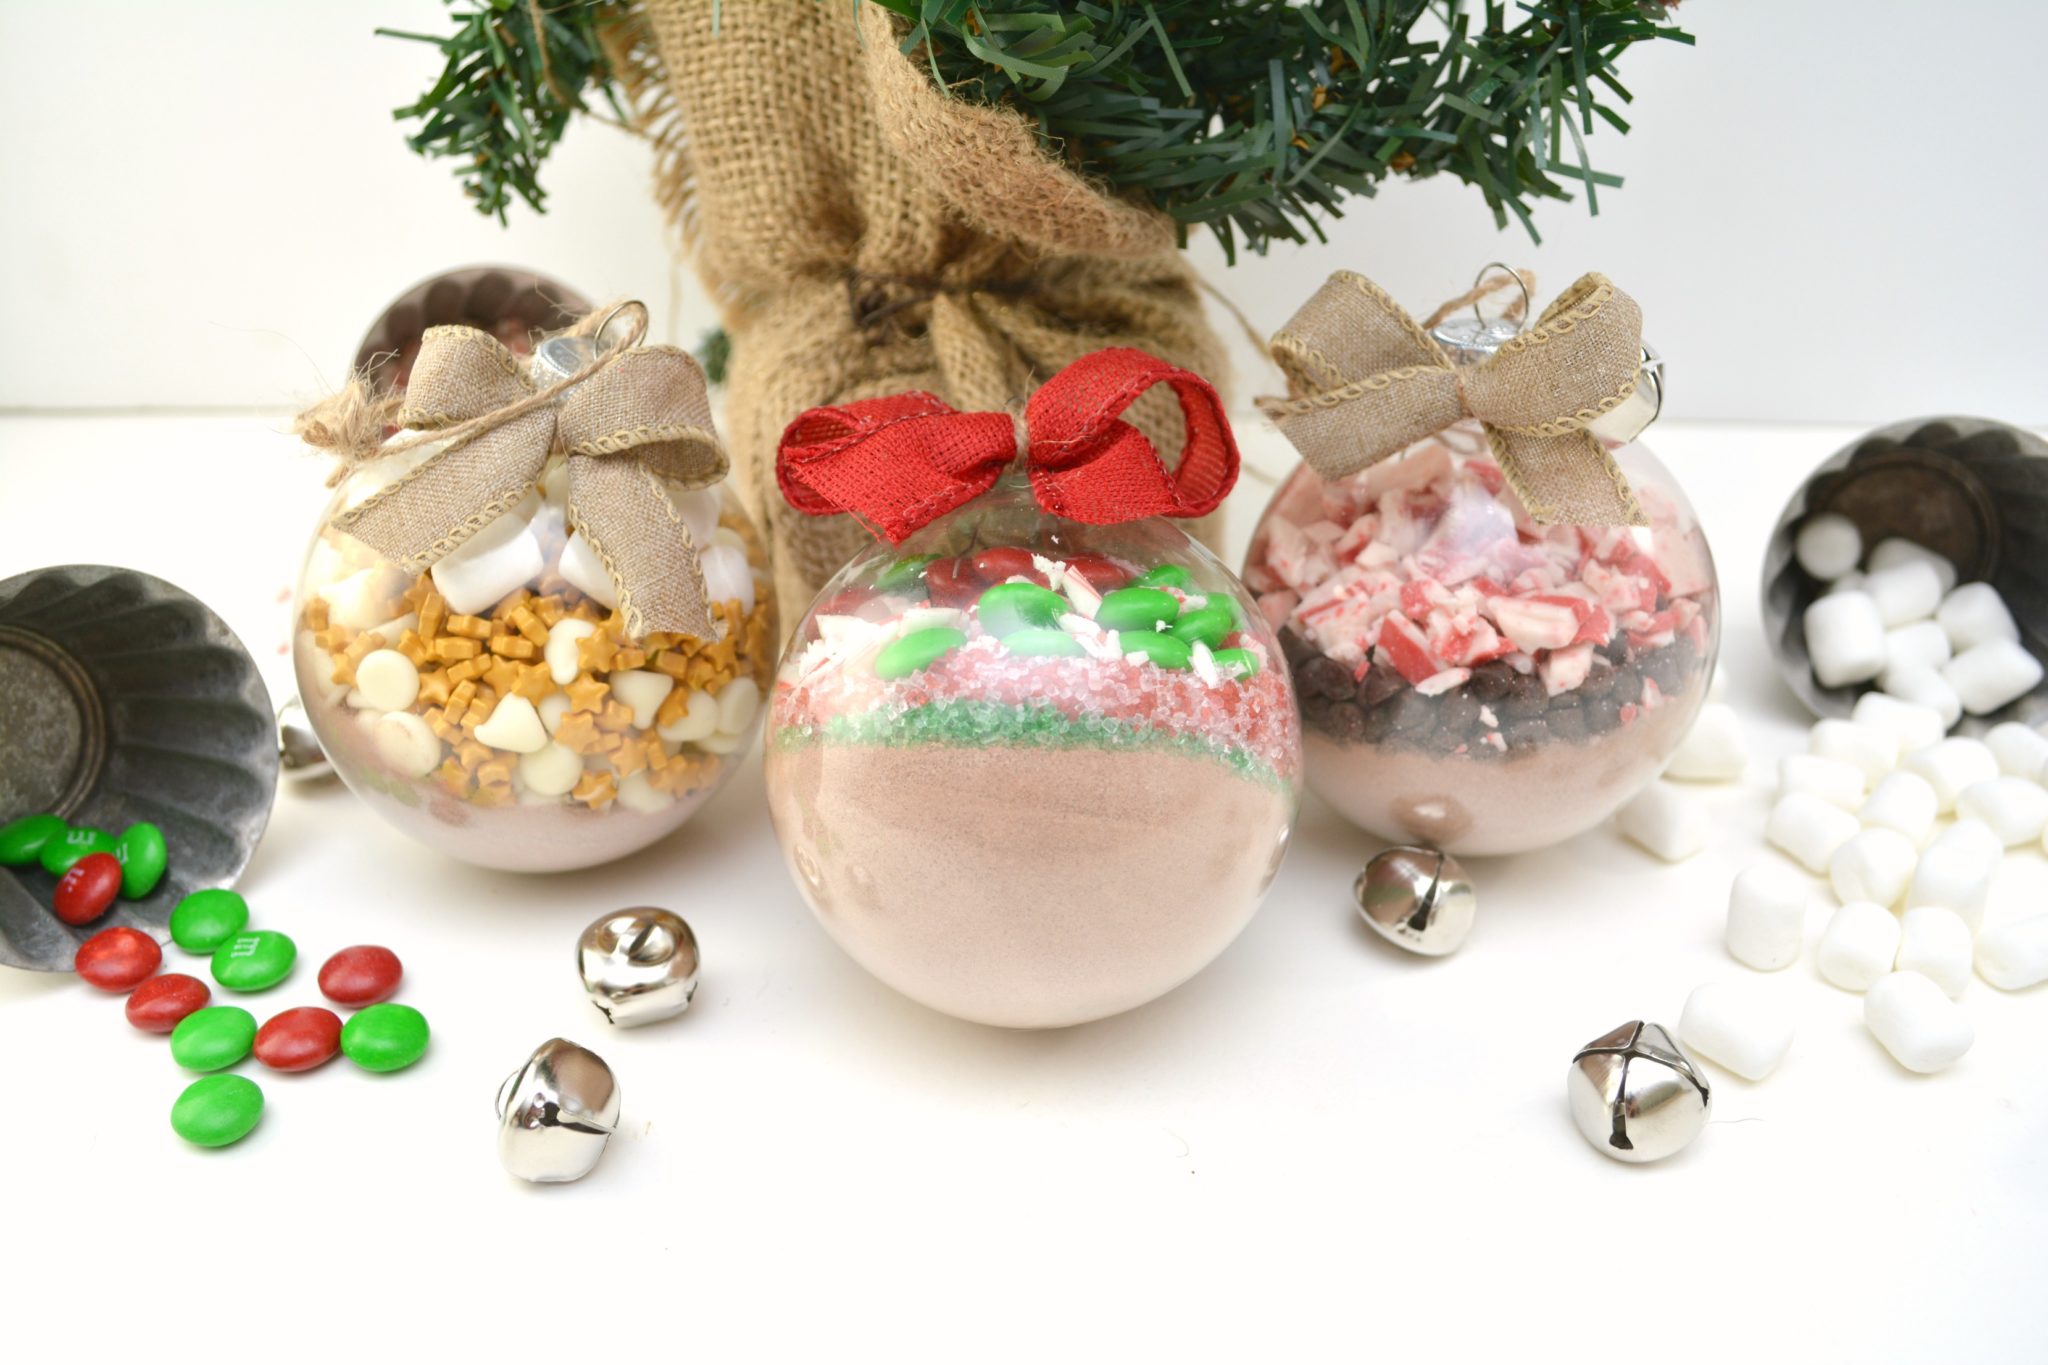
These hot chocolate ornaments are so much fun (and easy!) to craft that you can make them look beautiful even if the crafting gene wasn’t passed down to you (like me). The kids will want to help, too.
This post contains affiliate links.

Hot Chocolate Ornaments – 3 Different Ways
As you all know, I’ve set out to share some really easy crafting ideas this holiday season that are perfect for moms who just need simple ideas. I wish that I could create beautiful things like I see all over the internet, but I just don’t have it in me, or the patience sometimes. These hot chocolate ornaments can be completely customizable to things that you already have around your home and the kids will have so much fun making and giving them this holiday season!

What you need to make the hot chocolate ornaments:
- Plastic round ornaments
- Hot chocolate mix
- Various hot chocolate add-ins (my favorite are: chocolate chips, candy cane pieces, sprinkles, etc.)
- Holiday ribbon
- Twine
- Scissors
How to make the hot chocolate ornaments:

First, you want to start by washing out your ornaments and drying them completely. Use a funnel or rolled piece of paper to add the hot chocolate to your ornament. Make sure the bulb is completely dry before doing this. Fill the bulb about halfway with the hot cocoa mixture (like pictured). This is a great way for kids to work on those small motor skills!

Gently shake the hot chocolate to level it out in the ornament and then begin adding mix-ins to the bulb. Add in each item one at a time and gently shake it to form a layer on top of the hot cocoa. An add-in can be anything you like, including mini chocolate chips, white chocolate chips, mini marshmallows, sprinkles, holiday M&M’s, peppermint pieces and more – there are so many pretty things to choose from this time of year to make your hot chocolate ornaments stand out!

You can see that we make our hot chocolate ornaments three different ways, so feel free to copy or come up with your own style.

After you have finished layering your mix-ins to the top of the bulb or close to the top, you can place the lid back on the bulb.
 Tie a piece of twine through the top of the ornament to serve as a hanger for your hot chocolate ornament and then tie with a bow to give it a little extra pop. Give your hot chocolate ornaments as a gift or hang them on the tree to be used at home throughout the holiday season. Who knows? Santa might even want some hot chocolate this year instead of milk with his cookies!
Extra tips for making the hot chocolate ornaments:
- You can get extra fancy and choose clear ornaments that come in extra shapes and sizes, but just keep in mind that they won’t hold as much as the larger bulbs will.
- Each ornament can hold enough for 1-5 cups of hot cocoa depending on the size of the bulb you use. The ones used in this tutorial held enough for 3 cups of hot cocoa each and are medium sized bulbs.
Looking for more holiday crafts? Try these!
So what do you mamas think? Are you going to get crafty this weekend and make these really very easy diy hot chocolate ornaments? They make great teacher gifts and I even added a few to gift bags that I’ve put together as a fun addition. And my niece and nephew will most certainly be finding these mixed in with their other goodies. Just add the mixture to hot water or milk and enjoy!
Fashionably Yours,
Allison

